Mp3 player options and setup instructions
MP3 Player Options and Setup Instructions
Pronus J-908 MP3 Player
Pros: Small, cheap
Cons: Has LEDs on and built-in radio
Where to buy: Search for Pronus J-908 on Amazon
You should have purchased the supplies through the Amazon links we provide a MIFA mp3 player that includes its own yellow charger cord, and you should also have an 8 GB SD card and adapter which come in a small rectangular plastic container. If your computer only has a USB port but no slot for the adapter, then you should purchase the USB microcard reader which we have also provided an Amazon link to. Finally, make sure you have a charging block to plug the speaker and cord into.
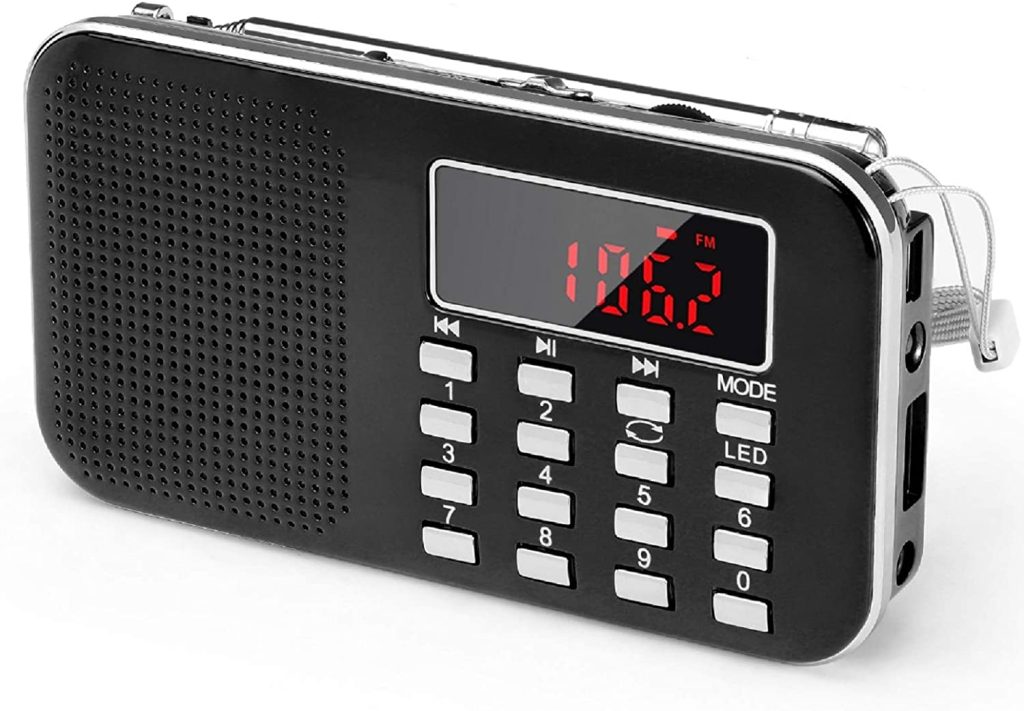
Setup Instructions for Pronus J-908
- Stick the adapter or USB reader into your computer and slide the SD card into it, face up where you can see the red writing “SanDisk”.
- Open the files app on your computer.
- You will see a pop-up within files that says “SD card”.
- Go to the Samadhi chants link we have provided.
- Download whatever tracks you will want to have on your speaker to your computer.
- Open files again and go to your recent downloads folder.
- One by one, drag and drop the music tracks into the “folder” labeled “SD card”.
- You will see each track copying and loading onto the SD card so just let it do that.
- Click the eject button on your computer to safely eject the newly loaded SD card from an adapter/USB reader from your computer.
- Stick the SD card into the slot beneath the flap on your speaker. There is only one right way to put it in, and it goes upside down with the black/metal part facing up.
- Push it in until you hear it click but DO NOT push too hard or else the SD card will get stuck in the player and you will never be able to get it out!
- Now hold down the power button with the circle on it until you hear the player beep to signal it has powered on.
- IMPORTANT: you must CHANGE the setting from speaker mode to SD card mode. After you power on the player, click the power button two more times until you hear a ding signaling it has entered SD card mode. Music should start playing. *IF YOU SKIP THIS STEP YOUR PLAYER WILL SHUT OFF RANDOMLY DUE TO HAVING THE WRONG SETTING*
- The controls on the player are as follows: after the music has been playing, press the power button (with a circle) once to pause. KEEP IN MIND that EVERY TIME you power on the player to play again after it was paused you MUST press the power button two more times to put it in SD card mode.
- The button with the plus on it increases volume if you press it quickly, minus decreases volume.
- To move on to the next track HOLD DOWN the plus button, to move to the previous track HOLD DOWN the minus button.
- TO HAVE THE PLAYER PLAYING CONTINUOUSLY YOU MUST KEEP IT PLUGGED IN. The charging cable slot is under the flap where the SD card slot also is.
- As long as you have gently pushed the SD card into the player, you should be able to remove it anytime you want to change which tracks are copied on. To remove, stick a paperclip on the edge of the inserted SD card and push, it should pop out easily.
- To change the selection of music tracks just follow steps 1 – 9 above. To delete a track from the SD card, once you have that folder open in files, all you have to do is left-click that track and press delete